This blog post is about creating certificates. Before installing the NDES role, you have to create two certificates.
Here are the links to the previous parts:
- Configure Microsoft Intune – Certificate – Part 1: Intro
- Configure Microsoft Intune – Certificate – Part 2: Certification Authority
- Configure Microsoft Intune – Certificate – Part 3: Azure Application Proxy Connector
- Configure Microsoft Intune – Certificate – Part 4: Certificate Templates
- Configure Microsoft Intune – Certificate – Part 5: CNAME and Application Proxy
Alrighty then, let’s try
Before installing the NDES feature on the server, you have to create two certificates. One certificate (NDES SSL Certificate) will be used for binding HTTPS in IIS and the other (NDES Client Certificate) will be used for the installation of the Intune NDES connector.
Enroll NDES SSL Certificate
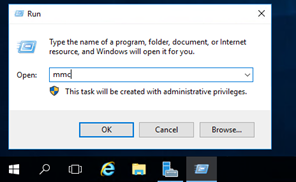 |
Go to your NDES server and open the MMC via run. |
 |
Add the Certificate Snap-in via File -> Add/Remove Snap-in.. |
 |
Select Certificates and click on the Add button. |
 |
Select Computer Account and click on the Next button. |
 |
Click on the Finish button. |
 |
Click on the Ok button. |
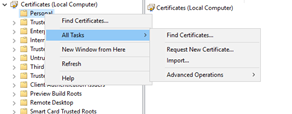 |
Right click on Personal and choose for All Tasks -> Request New Certificate. |
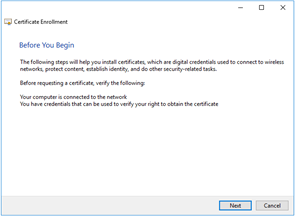 |
Next |
 |
Next |
 |
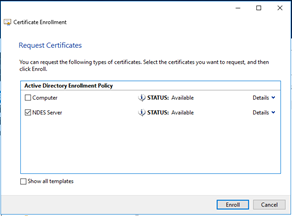
Select NDES Server and click on the link More information is required to enroll for this certificate. |
 |
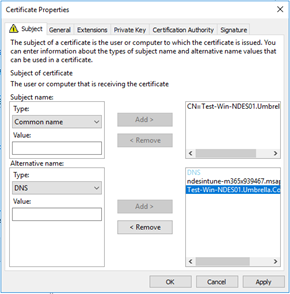
Enter the following:
Under Subject name: Common name = the external URL of your Application Proxy, like ndesintune-m365x939467.msappproxy.net Under Alternative name: DNS = ndesintune-m365x939467.msappproxy.net DNS = Test-Win-NDES01.Umbrella.Corp (FQDN of your NDES Server) |
 |
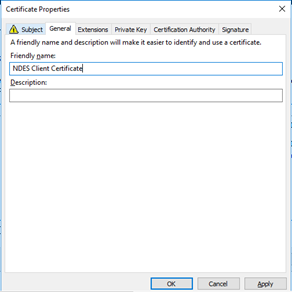
Go to the General tab. Enter here a friendly name. Click on Ok. |
 |
Click on the Enroll button. |
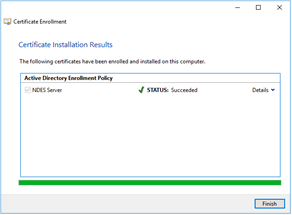 |
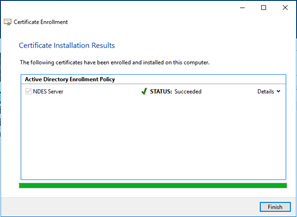
The certificate is enrolled on the server. Click on the Finish button. |
 |
Refresh the Personal node and you will see the created certificate. |
Enroll NDES Client Certificate
 |
Right click on Personal and click on All Tasks -> Request New Certificate. |
 |
Next |
 |
Next |
 |
Select NDES Server and click on the link More information is required to enroll for this certificate. |
 |
Under the subject tab, enter the following:
Under Subject Name: Common name = Test-Win-NDES01.Umbrella.Corp (FQDN of your NDES Server) Under Alternative name: DNS = ndesintune-m365x939467.msappproxy.net DNS = Test-Win-NDES01.Umbrella.Corp (FQDN of your NDES Server) |
 |
Under the General tab, enter a friendly name. Click on the Ok button. |
 |
Click on the Enroll button. |
 |
Click on the Finish button. |
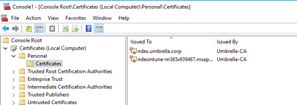 |
There are now 2 certificates under Personal in the Certificate store. |
Final
This is what we did in this blog post.
We have created two different certificates. They will be used for the NDES role and for the Intune NDES connector later.
Thanks for reading the blog. If you have any questions or comments about this, do not hesitate to contact me by email or by posting a comment here below. I am also active on social media and some community forums, like Technet forum, Yammer, and Techcommunity.
Good luck and Take care now, bye bye then…

I noticed when your enrolling the client certificate on the ndes server, you are using thes ame NDES erver template. Shouldn’t we be using the client template instead of the NDES server certifciate template? I am running into an issue when creating two cert templates, 1 for the Web Server for SSL (no problem), second for the client certificate, but cannot enroll it on the ndes serer since it says I don’t have permission to?
Hi Jeff, thanks for reading the blog. You can use the template for both certificates. If you trying to enroll the certificate as a Client certificate on the NDES server, you get permission denied warning? Did you set the correct permissions on the template via the security tab? It’s strange that you have enrolled the certificate for the web server, but you cannot enroll a certificate for NDES?
Great article!
Can I use the same SSL certificate for the NDES server certificate and the Connector client certificate if I put Server Auth and Client Auth into the Cert?
Does it cause problems for the connector if the Subject contains the external FQDN of the NDES?
Thanks Mike!
No, that is not possible. You have to use 2 separate certificates for that. 1 for the NDES server and the other for Intune NDES Connector.